Ozarks Gardening
Jim Long
Renee Shepherd of Renee’s Gardens told me this week she’s started a new seed project aimed at school gardens and other nonprofit groups. It’s a really great idea and I thought some of our readers might be interested.
Around the U.S. there are many schools that have added school garden projects, specifically in grades K-6. Schools are being pressured by parents and interested groups to change the school lunch programs in an effort to fight obesity. The schools are trying to offer healthier meals that aren’t deep fried junk food, but that include fresh fruit and vegetables.
I recently ran across a Magnate School in Jonesboro, Arkansas that has raised beds in which the children grow a variety of vegetables. (The school’s focus is health and nutrition). In a dozen 3 by 10 feet beds the children are growing lettuce, radishes, tomatoes, squashes, herbs and lots more. There are additional raised beds, as well and the school has a teaching kitchen with work tables and stove, sink and refrigerator, where each of the six grades learn about preparing what they grow.
This new project of Renee’s is meant to support schools like the one in Jonesboro as well as other nonprofit groups around the nation. What she offers is this: go to her website and click on this link: reneesgarden.com/fundraiser.html and sign up your organization for the fundraising project. You’ll receive a very brief form asking the name and purpose of your nonprofit organization, and who will be responsible.
Once you have signed up, you’ll receive your own coupon code for the organization, along with a press release you can use to advertise your project. Your organization refers your members, or the public, to Renee’s website. Your organization then receives 25% of the price of all of the seed ordered using that coupon code. (What a deal! You’re going to order seed anyway, why not use your purchase to support your own organization’s fundraiser?)
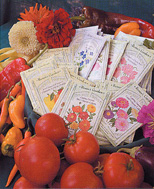
This is a year around fundraiser so you can promote it in your organizations’ newsletters throughout the year. If you have not visited reneesgarden.com before, check out her seed varieties. I especially like her selections. She does something that most seed companies fail to do, which is offering mixtures of seed. For example, she includes yellow, white and green bush squash together in one packet. Radishes include several colors in one package; lettuces can be ordered as individual varieties or several in one packet. I’ve used her seed for years and highly recommend her offerings. And this new fundraiser program is a great idea for just about any kind of nonprofit organization wanting to raise money for their group.
Here is the information from Renee's Seed:
Fax to: 831-335-7227
Email to: customerservice@reneesgarden.com (put "Fundraiser" in the subject line)
Mail to:
Fundraising Program
6060A Graham Hill Rd.
Felton, CA 95018
Tuesday, February 1, 2011
Friday, December 17, 2010
School Gardens
This year I’ve enjoyed opportunities for visiting school garden projects in other states. I’ve been impressed at the creativity and insight some of the schools have demonstrated. One in particular stands out of those I’ve toured recently.
Stonewall Jackson Elementary in Dallas has a 20,000 sq. ft. science lab, which includes vegetable and herb gardens, a large (and impressive) compost area, greenhouse, small chicken house, nature area and 35 class rows for food and fiber crops. All students plant vegetables, harvest, study insect populations, prepare the soil and compost and learn how to make landscape plans. The school takes a hands-on approach to teaching their students about science, as well as math, art and writing through the garden project. Imagine, in the middle of Dallas, students are learning where their food comes from and how it’s grown. (What these students grow, also ends up in the cafeteria, where the students can take pride in knowing they have a vested interest in the flavor and quality of their daily lunches).
Contrast that with schools that teach only reading, math and sports. My own grandson, when he was here for a visit at age 7, helped “pick” eggs from the hen house. But the look on his face when his mother broke one of the eggs into a skillet, showed he had no idea that chickens produced that flattened, fried thing he had for breakfast every day.
I visited a school in Cincinnati where students have plots of ground at the Cincinnati Botanic Garden. They work in teams of 8 students per 10 x 15 ft. plot. Each team is responsible for amending and tilling the soil, making a budget, planning and planting, tending and harvesting. A chef from a local restaurant set up a project for the garden that teaches the students about turning their produce into salsa, made in the commercial kitchen on the grounds of the Botanic Garden. The salsa is then offered for sale through the Garden’s gift shop. Those students learn not only how to grow and prepare the produce, but also how to calculate production costs, advertising, food safety, how to run a business as well as how to work responsibly in a team.
I see this as an encouraging trend in school curricula. As more and more schools look at connecting their students with real food (I don’t consider ‘tater nuggets and a hunk of breaded, frozen then deep-fried nameless meat patty to be “real” food for children’s brains) I believe children will have healthier meals and a deep respect for the food they eat. Call me old fashioned, but I believe children learn valuable life lessons about respect, food and life in general by working with plants and soil.
It’s easy to sign up to follow Ozarks Gardening blog, simply click the “Follow” button on the blog and you’ll be notified every time a column is posted there (and no, you will not receive ads or emails, either. It's a free service and you won't miss any columns that way). Happy gardening!
Stonewall Jackson Elementary in Dallas has a 20,000 sq. ft. science lab, which includes vegetable and herb gardens, a large (and impressive) compost area, greenhouse, small chicken house, nature area and 35 class rows for food and fiber crops. All students plant vegetables, harvest, study insect populations, prepare the soil and compost and learn how to make landscape plans. The school takes a hands-on approach to teaching their students about science, as well as math, art and writing through the garden project. Imagine, in the middle of Dallas, students are learning where their food comes from and how it’s grown. (What these students grow, also ends up in the cafeteria, where the students can take pride in knowing they have a vested interest in the flavor and quality of their daily lunches).
![]() |
| This is just a portion of the compost area. The "crowd" is a busload of Garden Writers of America members. |
Contrast that with schools that teach only reading, math and sports. My own grandson, when he was here for a visit at age 7, helped “pick” eggs from the hen house. But the look on his face when his mother broke one of the eggs into a skillet, showed he had no idea that chickens produced that flattened, fried thing he had for breakfast every day.
I visited a school in Cincinnati where students have plots of ground at the Cincinnati Botanic Garden. They work in teams of 8 students per 10 x 15 ft. plot. Each team is responsible for amending and tilling the soil, making a budget, planning and planting, tending and harvesting. A chef from a local restaurant set up a project for the garden that teaches the students about turning their produce into salsa, made in the commercial kitchen on the grounds of the Botanic Garden. The salsa is then offered for sale through the Garden’s gift shop. Those students learn not only how to grow and prepare the produce, but also how to calculate production costs, advertising, food safety, how to run a business as well as how to work responsibly in a team.
![]() |
| Students at Stonewall learn about planting seed and caring for them before transplant. |
I see this as an encouraging trend in school curricula. As more and more schools look at connecting their students with real food (I don’t consider ‘tater nuggets and a hunk of breaded, frozen then deep-fried nameless meat patty to be “real” food for children’s brains) I believe children will have healthier meals and a deep respect for the food they eat. Call me old fashioned, but I believe children learn valuable life lessons about respect, food and life in general by working with plants and soil.
![]() |
| You can just barely see it, but the chicken house and laying nests are just beyond the tree in the foreground. |
Tuesday, November 30, 2010
Wasted Pumpkins, Wasted Food
Ozarks Gardening
Jim Long
I’ve been wondering lately if ours is really the only country in the world that has so much food we can afford to throw it away. It came to mind right after Halloween when I saw large numbers of pumpkins thrown in ditches along the roadsides. And more pumpkins stacked beside garbage bins in front of houses, waiting to be carted away to the landfills.
For Thanksgiving I’d planned to stuff and bake a pumpkin. My recipe calls for a 3 pound pumpkin, top cut off like a jack-o-lantern and the innards removed. Into that go 3 cups of bread cubes, 4 ounces of cheddar cheese cubes, 2 finely chopped garlic cloves, 4 strips cooked bacon, crumbled, a diced green onion, 1 tablespoon chopped fresh thyme (I like orange thyme), 1/3 cup heavy cream and a tiny pinch of nutmeg. Mix all that together in the pumpkin, put the lid on and bake it for about 90 minutes at 325 degrees F. When the pumpkin is tender, remove it from the oven and let it set for about 15 minutes to cool. Just before serving, mix some of the pumpkin with the stuffing. It’s great.
But guess what? There were no pumpkins to be had at any of the stores. When I inquired at the produce departments of some stores I was told they had trashed their left over pumpkins after Halloween. One of them said, “People don’t think of pumpkins as food, just decoration so we throw them in the dumpster to make room for other things.”
I can’t imagine not recognizing pumpkins and squashes as food. Nor can I imagine throwing away crates of pumpkins to be sent to the landfill. Hogs eat pumpkins. They can be put in the compost where they become more soil. Even people eat pumpkins!
We’re fortunate we have such bounty that we can be wasteful. I was brought up to believe it’s wrong, even immoral, to waste food. Evidently I’m in the minority. It just seems like there should be a better solution. Maybe I’m just old fashioned.
This week in the garden we’ve planted radishes, lettuce and carrots in the cold frame. To see more of what’s happening in the garden each week visit my garden blog: jimlongsgarden.blogspot.com. Present and past Ozarks Gardening columns in this newspaper can be found at: ozarksgardening.blogspot.com. Happy gardening!
Jim Long
Wasted Food for the Holidays
I’ve been wondering lately if ours is really the only country in the world that has so much food we can afford to throw it away. It came to mind right after Halloween when I saw large numbers of pumpkins thrown in ditches along the roadsides. And more pumpkins stacked beside garbage bins in front of houses, waiting to be carted away to the landfills.
For Thanksgiving I’d planned to stuff and bake a pumpkin. My recipe calls for a 3 pound pumpkin, top cut off like a jack-o-lantern and the innards removed. Into that go 3 cups of bread cubes, 4 ounces of cheddar cheese cubes, 2 finely chopped garlic cloves, 4 strips cooked bacon, crumbled, a diced green onion, 1 tablespoon chopped fresh thyme (I like orange thyme), 1/3 cup heavy cream and a tiny pinch of nutmeg. Mix all that together in the pumpkin, put the lid on and bake it for about 90 minutes at 325 degrees F. When the pumpkin is tender, remove it from the oven and let it set for about 15 minutes to cool. Just before serving, mix some of the pumpkin with the stuffing. It’s great.
But guess what? There were no pumpkins to be had at any of the stores. When I inquired at the produce departments of some stores I was told they had trashed their left over pumpkins after Halloween. One of them said, “People don’t think of pumpkins as food, just decoration so we throw them in the dumpster to make room for other things.”
I can’t imagine not recognizing pumpkins and squashes as food. Nor can I imagine throwing away crates of pumpkins to be sent to the landfill. Hogs eat pumpkins. They can be put in the compost where they become more soil. Even people eat pumpkins!
We’re fortunate we have such bounty that we can be wasteful. I was brought up to believe it’s wrong, even immoral, to waste food. Evidently I’m in the minority. It just seems like there should be a better solution. Maybe I’m just old fashioned.
This week in the garden we’ve planted radishes, lettuce and carrots in the cold frame. To see more of what’s happening in the garden each week visit my garden blog: jimlongsgarden.blogspot.com. Present and past Ozarks Gardening columns in this newspaper can be found at: ozarksgardening.blogspot.com. Happy gardening!
Drying Chilies
Ozarks Gardening
Jim Long
Drying Chilies
“Last night, there came a frost, which has done great damage to my garden.... It is sad that Nature will play such tricks on us poor mortals, inviting us with sunny smiles to confide in her, and then, when we are entirely within her power, striking us to the heart,” a quote from Nathaniel Hawthorne in The American Notebooks.
I feel like that sometimes, too. I dread the night when the garden must die. In mere hours it goes from lush and green, to a deadly shade of brown. The last of the string beans hang like socks hung out to dry. The hot chilies turn into tiny deflated balloons, hanging where they grew.
I gathered about a half bushel of hot peppers before the frost came. I grew 18 varieties of chilies in all, plus 5 plants of the ghost (Bhut Jolokia) pepper. Most had begun producing peppers again after the drought passed, but it was still a smaller pepper harvest than I would have liked.
Once the peppers were picked from the plants, I brought them indoors. With scissors, I cut the stem end off of each pepper. With the larger, more fleshy ones, I also split those in two. I learned years ago that the drying time for chilies can be cut in half if the peppers are split open for air flow.
All the peppers went together. The ‘Yummy Orange’ (a sweet pepper), some Jalapenos, Big Jim, Trinidad Scorpions, Trinidad Spice and some of the Bhut Jolokias, all went in together. Once the stem ends were off and slits cut, the peppers went into the food dehydrator. It takes 3 days on fairly high heat to dry them, a bit longer for fleshy ones.
Once the peppers are dried to total crispiness, I put them in gallon zip plastic bags and put a new batch in the food dehydrator. Over and over I repeat the process until all of my chilies are dried. Then I put on protective glasses and a dust mask and process them in small batches in the food processor. I’ll have several quarts of fine pepper flakes (seed and all) for my cooking this winter, and some to give away to my pepperhead friends.
To see photos of the peppers I grew and the food dehydrator process, check my garden blog: jimlongsgarden.blogspot.com You can also see photos at the blog for this newspaper: http://ozarksgardening.blogspot.com/ Happy gardening!
Sunday, October 31, 2010
Compost the Leaves of Summer
Ozarks Gardening
Copyright Jim Long, Oct 31, 2010
The Leaves of Summer
I’m sure leaf raking is great exercise and I’m sure I could benefit from more of it. The fact is, I really don’t like raking leaves and so I look for ways to not have to do it. I use a leaf blower when the leaves are newly fallen and still dry. If a stiff wind is blowing, all the better, hustling the leaves off down the hill. But more likely that would-be welcome wind blows the leaves right back again.
We have a lot of trees in the lawn. Several oaks, a couple of hickories, a silver maple, 2 native hard maples, several dogwoods, redbuds and assorted pine and cedar trees. When fall comes, there are enough leaves to fill a large dump truck, two or three times.
I used to rake the leaves into piles, haul some away on tarps and burn the rest in the driveway. But that meant a lot of raking, piling, tugging and emptying, not to mention piles of ashes and burnt gravel from the fires. Now I use the leaf blower to get the piles of leaves away from the buildings and into windrows. Then I use the riding lawn mower to chop them over and over into mulch. I start when the leaves begin to fall and repeat the operation several times over a few weeks until I’ve chopped up all the leaves from the now-bare trees.
But the next part of my little operation is the best. I rake the chopped up mulch into plastic garden carriers and take them to the compost pile. Once the leaves have been chopped into smaller pieces, even the big, leathery oak leaves will compost. I mix the chopped up leaves into the compost pile, along with some grass clippings and a bit of chicken manure from the barn. I turn over some of the older compost on the far end of the compost pit, then I leave it for winter. By next spring I’ll have compost that I can add to my garden soil. And I’ll feel like I’ve accomplished something beyond just getting rid of the leaves.
This summer while in Dallas for a writer’s conference, our conference group visited a variety of substantial home gardens. One of those, a multimillion dollar house, had a big compost pile in their back yard, not unlike mine. All of their grass clippings, leaves, vegetable peelings and coffee grounds, went into their compost. I figure if a fancy place like that home in Dallas can do such a good job of composting, then my method of getting rid of leaves and making compost isn’t too far off the mark.
Want to know why leaves change colors? Go here.
To find my books on herbs, gardening and history subjects, visit my website: http://www.longcreekherbs.com. Happy gardening!
Wednesday, October 20, 2010
Controlling Japanese Beetles
Ozarks Gardening
Copyright 2010 Jim Long
Controlling Both Japanese Beetles and Armadillos!
This summer was my third year of dealing with Japanese beetles. Before that, I had no idea what one even looked like. The first year I had them I bought a Japanese beetle trap and hung it in the garden, and within days, had hordes of the beetles. (Recent research has shown that the traps actually attract more beetles to your yard then you would have normally had; so no more traps for me).
Japanese beetles begin as grub worms. You remember those pesky grubs you found when you were turning over the garden soil last spring? (Several other beetles begin as grubs, too). I feed the grubs to my chickens when I find them in the soil, but I miss a few thousand.
One of the best controls for Japanese beetles is something called Milky Spore Bacteria. It’s a powder that includes a natural bacteria that gets into the bodies of the grubs and gives them disease. They die and their decomposing grub bodies spreads the disease in the soil to more grubs. This bacteria is not harmful to humans, pets, birds or even other kinds of worms, like earthworms - which are beneficial. It only affects the grub worm stage of Japanese beetles.
Milky Spore Bacteria must be applied three times, once in the fall, the following spring, then again the next fall. It’s applied with a simple garden fertilizer spreader and you’ll find the rate of application on the Milky Spore bag; it usually comes in 10 and 20 lb bags.
There is, of course, another method of control, which is to apply a chemical grub killer to your lawn. It does kill the grubs, but you don’t want your pets or children in the grass for several days after the poison is applied. That kind of poison also kills everything else in your soil, including earthworms and over wintering beneficial insects. It often kills birds that eat the poisoned worms, often kills chipmunks, too. And if your cat or dog eats the dead or dying chipmunk, it will probably kill your pet, as well. (You don’t want to kill earthworms, or “fishing worms” as I grew up calling them. They are what keep your soil aerated, help increase the nutrients in the soil and keep the grass roots from becoming compacted).
The safest control is to use Milky Spore Bacteria, If your neighbor’s yard butts up to your lawn, getting them to apply the Bacteria, too, helps even more. Once the three applications of Milky Spore Bacteria has been applied, it remains in the soil for years, continuing to safely control Japanese beetles. Be sure to apply the Bacteria to your garden beds, in addition to the lawn, the sneaky grubs are everywhere.
According to Purdue University, things that have been proven to absolutely not work include the traps, interplanting with supposedly beetle-resistant plants, nor grinding up the insect bodies and making a spray.
Milky Spore Bacteria is available at many hardware and garden stores (including Nixa Hardware in Nixa, MO). You can easily order it from companies that deliver it to your door. In checking the web, I found varying prices and sizes: Snow Pond Farm Supply Co. Phone 781-878-5581 Biocontrol (800) 441-2847 www.biconet.com and Dirt Works, www.dirtworks.net 877-213-3828. Order yours now and get a jump on next year’s Japanese beetle problem. Oh, and the other benefit of controlling the Japanese beetle grubs? Armadillos, which dig in your yard looking for the grubs, will go over to your neighbors yard and dig there instead!
To see what’s happening in my garden this week: http://jimlongsgarden.blogspot.com. To read past Ozarks Gardening columns from this newspaper, visit: http://ozarksgardening.blogspot.com/ and to see links to additional on-line information. Happy gardening!
Thursday, October 7, 2010
Bringing Herbs Indoors for Winter
Ozarks Gardening
Copyright 2010 Jim Long
Bringing Herbs Indoors for Winter
Every fall I receive questions from gardeners about bringing their herbs indoors for the winter. I’ve found that most people (myself included) aren’t willing to do all of the things necessary to get their herbs to thrive indoors, and ultimately before spring, will be disappointed. Here are the basics for growing herbs indoors in winter.
1-Start with smaller plants, which transplant easier than larger ones, and give the plant a slightly larger pot than you think it needs. For example, a well-established basil plant, 24 inches tall in the garden, will be fairly difficult to dig and transplant. But if it’s already growing in a pot, you can shear it back by about a third of the size before bringing it indoors. Also, be sure to spray it well, under the leaves, on the stems and around the rim of the pot with one of the food-safe insecticides listed below before bringing the plant indoors to avoid transporting insect pests with the plant.
2-Most culinary herbs require full sun to survive. "Full sun" means at least 8 hours of sunlight per day. Less light and the plants will be spindly and weak and not grow. A sunny window facing south, can help but the danger there is the window glass may act like a magnifying glass if the plant is too close and actually scorch the leaves. And most windows in winter only provide about 3-5 hours of actual sunlight each day, less than is necessary for an herb like basil to grow well. The most successful way to grow herbs indoors is to use either a greenhouse room that gives all day sunlight, or a grow-light with a timer set to be on 8 hours each day.
3-Once the plants are moved indoors, plan to spray the plants every two weeks with a safe insecticide, such as Safer's Soap solution, or ultra-fine oil spray to prevent mealy bugs, red spider, scale insects and aphids. Keeping current with the spraying will help avoid insect problems that once started are difficult to control and can destroy the plants. (To make your own oil spray: 1 cup vegetable oil mixed with 1 tablespoon dishwashing liquid. To use:
mix 1 tablespoon of mixture with 2 cups of water. Fill a spray bottle and shake wel, then spray).
Plants that work well indoors under a grow light or in a greenhouse room include chives, garlic chives, parsley, marjoram and oregano. Basil is more difficult indoors but can survive if provided with enough light.
Rosemary, on the other hand, should be kept in an unheated, well lighted room, such as a garage or enclosed back porch. Water it sparingly (about every two weeks) Too much water, or too warm a room, will kill rosemary. Sage, thyme, oregano, chives (and usually rosemary) are all hardy outdoors and can usually be harvested for much of the winter from the garden.
Once you have your herb plants indoors, don’t fertilize them. Plants go into a period of semi-dormancy, meaning they do little growing indoors in winter. Fertilizing them can actually cause them to die. Wait until March, when the days are beginning to get longer, then begin lightly fertilizing.
My book, Growing & Using the Ten Most Popular Herbs, is an excellent resource for this very thing. It's available from my website: www.LongCreekHerbs.com and lists the requirements for growing all of the top 10 most useful culinary herbs. Happy gardening!
Subscribe to:
Comments (Atom)


