Monday, October 29, 2012

Ozarks Gardens, Not So Bad After All


Sometimes it’s good to visit other kinds of gardening to make you appreciate your own. Our soil in the southern Ozarks is rocky, with lots of clay and yet we manage to grow pretty good gardens. Farther north in Missouri, and farther south in Arkansas, there’s actual soil to be found, more fertile, less rocky. But not all gardeners have the luxury of either kind of soil for their crops.

Last week I was in southern Arizona, Tucson to be exact, for a garden writers conference. Each year our conferences are held in different parts of the U.S. or Canada, exposing our membership to a wide variety of growing conditions and plants. Tucson was an area many of the 400 people who attended the conference, had never been before.
Pretty to look at, impossible to touch.
Imagine if you will, soil that looks like a hard, gray, gravel road. Any gravel road, anywhere in our area, looks pretty much like Tucson soil. Now imagine that the hard, gray, gravel is the only soil and you have to dig it with a pick to loosen it enough to make some sort of hole for your plant. Now imagine getting only 9 or 10 inches of rain in a year, and in a place where the summer daytime temperatures regularly reach 120 degrees.

It apparently is possible to grow some food crops there. Native Americans grew squash, beans and corn, as well as tiny hot peppers and some wild herbs. Since it doesn’t freeze in the lower areas, winter crops of lettuce and even some tomatoes can be grown. But what does best of all, are cactus. Hundreds, maybe thousands of kinds of cactus grow everywhere. They grow out of the rocks up into the mountains, they grow out of the cracks in the pavement along the road. They’re the only plants in the landscapes of yards and businesses. Grass is virtually non-existent.
Note the soil around the prairie dog.
Cactus are interesting to look at. Some produce beautiful flowers, some even produce edible fruit. But if you have 400 people, loaded onto 5 buses, and walking around in the gardens, what you soon learn is to watch where you walk. With that many people, at every turn in a garden, you are getting poked, stuck and prickled with cactus thorns!

In our Ozarks gardens, you can safely reach out and feel the plants you grow. Tomatoes and peppers and herbs don’t attack you every time you look away. But in a desert garden, you have to watch for rattle snakes, cactus with long thorns, cactus with thorns that look like paper, some that look like fuzzy puppies, all which will do painful damage to your skin.

While it is interesting to visit other kinds of gardens, this one in particular, made me especially grateful for our soil, our climate and most of all, for the wide variety of plants we can grow here.

Wednesday, October 17, 2012

Preventing Insect Pests for Next Season

Ozarks Gardening
Jim Long; 10/10/12

Bugs Coming Inside for Winter

I’ve not been prying into persimmon seed to see if there are spoons, forks or knives yet, to determine the kind of winter we’ll have, but if the invasion of bugs into homes is any indication, we may have considerably more cold this winter. Of course it wouldn’t do any good for me to open persimmons and pry open the seed as there’s no over-all agreement whether a spoon means a winter of plenty, or that it means you’ll be digging out of snow. Or that a knife means a sharp, cutting winter, or one with plenty, like spreading butter on bread.

Flies have been hanging onto the screens ever since the few nights of near-freezing temperatures, darting in at every opportunity. The Korean ladybugs have been finding their way inside and crawling behind baseboards to hibernate. I even saw a television story this week about scorpions making their way into houses, although I’ve not seen any evidence of that.

The local television photos of the scorpions made them look like they were the size of a person’s hand, when in actuality our local scorpions are closer to the size of a garden spider. In Thailand where I visited some time back, people collect their native, giant hand-sized scorpions and deep-fry them for snacks. I’m not ready to do that, but if you do have garden pests invading the house, the spider sticky-traps do a pretty good job of catching all kinds of unwanted bugs.

As far as the garden is concerned, October is a perfect time to clean up old dead plants and burn or dispose of them. Clean-up is especially important for tomato plants. Any of the tomato diseases you may have had to fight with this season, are likely still present in the dead tomato plants. They should be removed from the growing area and either burned or put in the trash and not left in the garden.

Now’s a good time, as well, to till the garden soil. Turning it over exposes grubs and insect pests’ eggs, allowing birds to eat the insects. Another tilling in mid-winter is a good idea, too, turning the soil over again to expose things like grasshopper eggs so they will freeze and not hatch so many next year.

Cover crops such as winter barley and annual vetch can still be planted. Buckwheat, which is a good nitrogen-fixing crop, does better if it’s planted earlier and has a good foothold before cold weather hits. Such kinds of cover crops are usually left until early spring then turned under to allow the material to decompose and add nutrients to the soil. That early tilling also accomplishes turning up insect eggs and exposing them to cold weather and birds.

Visit my garden adventures blog, too. http://jimlongsgarden.blogspot.com

Tuesday, October 9, 2012

Book Contest

In a recent survey of readers on my gardening blog (http://jimlongsgarden.blogspot.com, followers told me you like contests. I receive lots of books in the mail to review, so I'm going to pass them along to followers here. This contest is for folks who follow my regular gardening blog. 
If you're not a follower, sign up today (see the button on the right that says, "Join this Blog"? Click it and you'll be entered in the contest as soon as you leave a comment). You must be a follower, and you must leave a comment in the comments section to enter the contest. Details for leaving a comment are also on the right side of the page of that blog. Again, the contest is open to everyone who shows up as a follower on the right side of the blog page of jimlongsgarden.blogspot.com In a recent survey of readers here, you told me you like contests. I receive lots of books in the mail to review, so I'm going to pass them along to followers here. This contest is for folks who follow that blog. 

NOTE: The contest will run until Oct. 17. I will announce the winner of the books shortly after that.
If you're not a follower, sign up today (see the button on the right that says, "Join this Blog"? Click it and you'll be entered in the contest as soon as you leave a comment). You must be a follower, and you must leave a comment in the comments section to enter the contest. Details for leaving a comment are also on the right side of the page of my regular garden blog. Again, the contest is open to everyone who shows up as a follower on the right side of that blog page, and who leaves a comment about today's post. The contest will run for a week and the winner will be chosen at random from the number of comments posted. I will announce the winner in about a week, here, and that person will have to contact me by email to give me their address so I can send the prizes. (If you aren't aware, I have no way of contacting those who are listed as followers, there is no email address or other information posted anywhere that I or anyone else has access to). Here are the books that will go to the lucky winner:


248 pages, this is a wonderful gardening guide.
The Non-Stop Garden, a Step-by-Step Guide to Smart Plant Choices and Four-Season Designs, is a comprehensive guide to year around color using perennials, shrubs and blooming plants. I've known Stephanie Cohen for many years and she's a columnist for Fine Gardening magazine. Co-author Jennifer Benner is a former editor of Fine Gardening and an experienced nursery designer. Both of these folks know plants and design very well. $14.95, available from most bookstores and on-line.
224 pages of great landscape ideas.
Stone Landscaping guides you step by step through creating stone pathways, walls, patios and other projects made of stone. The photographs are from Rosalind Creasy (author of Edible Landscaping) so you know it's beautifully illustrated. This is a wonderful guide to creating a stunning landscape using stone and creative design ideas. $19.95, from Better Homes & Gardens, and available at bookstores nationwide.
Home Remedies That Work, $6.95.
And last but not least, the winner of this contest also receives a copy of my newest book, My Favorite Home Remedies That Work. You'll find many of my own home remedies formulas as well as lots more from trusted sources and research. It's 40 pages of valuable, useful information for saving money and healthy living with natural remedies. My book is available from my website, as well as from herb shops nationwide.

So become a follower, Join my garden blog, and leave a contest and you will be entered to win these 3 books!

Sunday, September 30, 2012

Drying Herbs for Winter

A dark, airy attic is the perfect place for drying herbs of any kind.
Copyright©Jim Long, 2012

Last night while I was making a pot of spaghetti sauce, I reached into the spice cabinet for my jar of Italian Seasoning. It was nearly empty, which reminded me I had not dried many herbs to replenish it. Fortunately there were plenty of fresh herbs in the garden to season the sauce, and those taste better anyway. But I will get busy this week putting together the ingredients for another jar of Italian Seasoning.
Lemon balm ready for drying.

Italian Seasoning, from my book, Great Herb Mixes You Can Make, needs (all dried): 2 parts marjoram, 4 parts basil, 2 parts oregano and 1 part crushed rosemary. Depending on the volume you want to make, parts can mean tablespoons, cups or pounds.
Springs of herbs ready for drying.

My method for drying herbs is to harvest stems with leaves, about 6 inches long, and tie 6 to 10 stems in a bundle, holding them together with a rubber band. I hang those in my drying room which is dark, airy and well-ventilated (an attic works well for this). I sometimes use my food dehydrator, which works really well, but this of year it’s filled with hot peppers drying.
You can put about twice this amount in the paper bag.

The other method that works well is to put 15 - 20 stems, a big handful, of the herb you want to dry into a brown paper bag. Fold the top closed, held with a clothespin or large paper clip, and toss it into the trunk of your car (or back seat if you don’t have a trunk). The paper slowly wicks away the moisture in the herbs, the paper keeps out sunlight, and the trunk of your car is often hot for much of every day. Give the bag a shake every 2 or 3 days to keep the herbs from compacting, and in about a week to 10 days, your bag of herbs will be crispy-dried and ready to use.
Herbs ready for drying in the car.


What not to do: Don’t hang herbs for drying in the kitchen. The light from household lighting breaks down the colors of the leaves, and when that happens, the essential oils that give the herb its unique flavor, will be lost. Additionally, drying this way leaves the herbs open to absorbing all your cooking and household smells - you end up with rosemary that smells more like bacon or pot roast, or even the family dog! Also, drying in the microwave isn't a good idea, either. Microwaves, by their design, vaporize moisture out of whatever is put in them. When the moisture is vaporized, so are the essential oils that give the herbs their flavor. You’ll have a great smelling microwave, and dried herbs that taste slightly better than hay.
Recipes and formulas for over 100 seasonings and projects.

Once the herbs are dried, crush the leaves from the stems, then measure the amounts to make the Italian Seasoning. Store your mixture in an airtight container in a dark place, like the kitchen cabinet or pantry. More seasoning mixes can be found in my book, Great Herb Mixes, which is available from my website (LongCreekHerbs.com) or from a store near you. Happy seasoning!

Sunday, September 23, 2012

Bring Houseplants Indoors

Allspice and Bay Rum plants moved indoors.

Ozarks Gardening
Copyright© 2012 Jim Long

Every year I put off the job of bringing my indoor plants back into the house. They always do better outdoors on the deck than they do in the winter. But it’s a job that has to be done and as the nights get cooler, the plants need to come indoors.

I cease all fertilizing in early August. Giving houseplants fertilizer too late in the summer may cause a growth spurt, then when there’s not enough sunlight indoors, the plants suffer. The plants can even die due to too much fertilizer at a time when they’re going dormant. So definitely no fertilizer this time of year (that holds true for outdoor shrubs and roses, as well, they are all slowing down and going dormant for winter).
I offer this for sale, click the link below for more information and price.

Year around I keep Horticultural Oil Spray on hand. It’s mixed with water and sprayed with a small pump sprayer, and works well on vegetable crops in the garden as well as on houseplants (but not on African violets). So before I bring my plants indoors, I prune them some, then give them a thorough spraying, enough that the spray solution is dripping off the leaves. I’m careful to spray the undersides of the leaves as well as the stem or trunk of the plant, and even the top of the soil and edges of the pots.

If I dig up something from the garden - for example I’m bringing one of my hot pepper plants indoors - I’ll spray that the same way. Then in about 2 weeks, on a warm, sunny day, I’ll carry all the plants back outside and give them a second spraying. Why, you may wonder?

The life cycle of most houseplant pests is about 10-14 days. If you sprayed well before your brought the plants indoors, you’ve killed the insects that were on the plants already. But any eggs they laid will hatch out in about two weeks. The second spraying is necessary  to prevent new batches of pests.

The most common insects that plague indoor plants include: red spider mites, scale, mealy bugs and aphids. All of those are easily killed with the Horticultural Oil Spray. It’s available in some garden supply stores and on-line. I keep it on hand for sale when someone requests it, as well. It’s the most reliable way of keeping indoor plants healthy and pest free.

Scale insects are slightly more difficult to deal with and may require 3 or 4 sprayings over a couple of months. If you have old ferns or citrus plants, you’re likely to have scale. It looks like little bumps on the stems and undersides of leaves. Horticultural Oil Spray kills those in one spraying, but the eggs that haven’t hatched yet remain and repeated sprayings are necessary.

Visit my gardening blog, too: jimlongsgarden.blogspot.com

Saturday, September 8, 2012

Plant Bulbs for Spring

Ozarks Gardening
Copyright©Jim Long 2012

It’s a challenge to think about next spring’s garden right now. Most of us feel like  our gardens have been whipped, beaten, starved and tortured by Mother Nature. Some folks have just given up and plowed under whatever was left of the summer’s garden. But those of us who are stubborn, hardcore gardeners know that come spring, we’ll be thirsty for some green and some colorful flowers.

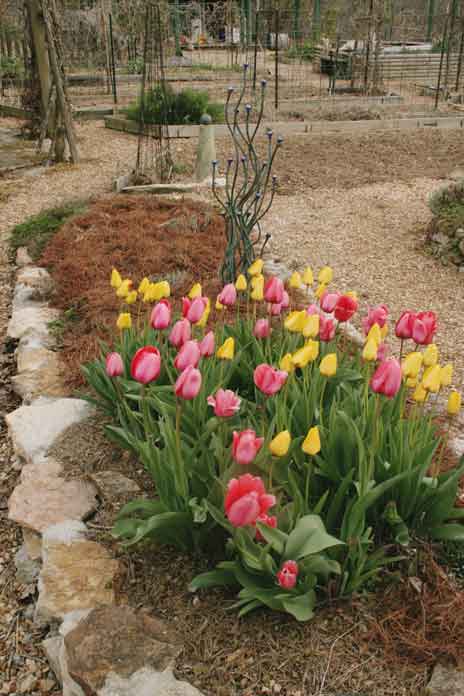
Spring is, without a doubt, my favorite time of year. Remembering what spring is like, is what gets me through the gray, dreary days of winter. Knowing that by spring, morels will come up, dogwoods will bloom and the tulips and other bulbs will burst out of the ground like pompom girls at a football game motivates me to plant.

To have spring color means getting down on your hands and knees and planting bulbs (or talking your grandkids into doing it). Tulips, daffodils, hyacinths and other spring bulbs, have to go in the ground in the fall. Anytime between the first of September and the first of December is good timing. Make sure the bulbs are healthy (meaning fleshy, rather than hollow or dry-feeling). Plant tulips, jonquils and hyacinths about 6 inches deep. For smaller bulbs like grape hyacinths, 2 inches deep is adequate.

Forget the sales pitches about adding bone meal when you plant tulips and jonquils. Bone meal is for building up bulb size, it’s what the commercial growers use to grow the bulb you eventually buy. Bonemeal does absolutely nothing to make the blooms better next spring - I learned this directly from a commercial bulb grower. If you want to fertilize and use bone meal, use it in the spring after the blooms have faded to build up the bulb’s strength for the next year.

Fall is the time to dig and divide iris and peonies and those will benefit by some bonemeal and some compost. Don’t use anything with a lot of nitrogen or you will get big leaves and no blooms next spring.

Garlic is another crop that should be planted now. I’ve planted as early as August and as late as the end of November, but the ideal time is mid to late September. It will grow throughout the winter and spring and by early summer, garlic will be ready to harvest. Because you are wanting big bulbs on the garlic, it too, benefits from bonemeal. I apply a cup of bonemeal for about every 18 inches of garlic row. And like all bulb crops, don’t get carried away with nitrogen. If you’re thinking of using fresh or not yet rotted cow or chicken manure on such plants - don’t. The high nitrogen content will  give you great big, green leaves and little else. That holds true for any bulb crop, whether garlic or decorative bulbs in the yard.


With a little effort now, a little bit of time digging a few holes, you will be rewarded next spring with loads of flowers. You’ll think back to this year and be glad you made the effort.

Tuesday, August 28, 2012

Bhut Jalokia, Trinidad Scorpion Chiles

Bhut jalokia chiles, rated at 1.2 million Scoville Heat Units.
In 2007 the Guinness World Records organization certified the Bhut Jalokia pepper as the hottest in the world. The next year, if you searched for the words, “Bhut Jalokia” or “ghost pepper” on Google, my garden blog would show up at the top in the search rankings. I wasn’t the only one in the U.S. growing the peppers, I was just one of the first who was writing about the peppers in my blogs and encouraging others to grow it. Now you’ll find lots of listings for the pepper, although my blog posts still show up on the first page of Google (for those of you who don’t use Google searches, high rankings are a good thing). I’ve been growing the chile pepper every year since.
Trinidad Moruga Scorpion chile, 1.2 to 2 million Heat Unit
Last year the Bhut jalokia dropped in ranking from the world’s hottest, to the second-to-the-hottest pepper on earth. It was replaced by the Trinidad Moruga Scorpion pepper. The difference in the two? In terms of Scoville Heat Units (the officially recognized measurement of pepper heat) the Bhut jalokia weighs in at one million to 1.2 million Heat Units. By contrast, the Trinidad Moruga Scorpion comes in with a whopping 1.2 million to 2 million Heat Units, depending on growing conditions. Since most people think a jalapeno is hot (coming in at a mere 10,000 Heat Units) the Bhut and Scorpion peppers are exponentially hotter.

Bhut Jalokia plants in November.

I haven’t grown the Scorpion yet, but will be. My half dozen Bhut Jalokia plants are doing well, although this is not a chile pepper that likes the heat. Bhut Jalokia is native to Sri Lanka, in the mountainous tea growing region of India. It does best in cooler temperatures and so I expect, like last year, pepper production will increase considerably as fall comes on. Last year, when all my other hot peppers were over and done, the Bhuts were cranking out peppers clear into November.

This season for the first time I have encountered a pepper-wasting disease. Actually it’s related to the Verticillium wilt that affects tomatoes some years, but I seem to have encouraged it, unknowingly. I mulched my plants especially heavily with straw this year. And because the plants have looked deep green and “happy,” I thought I was doing them a great favor by watering every other day throughout the drought.

Wilting disease in peppers affects chiles that are heavily mulched, and plants that are over-watered. The plant wilts, as if it needs water, then just dies in a few days. Out of the 35 peppers, 29 of which are hot, I have lost 8 plants this year. Once I learned the problem, from an internet search, I cut back to watering only once a week, pulled back the mulch from around the plants and it seems to have slowed the progression of the disease. I’ll not plant peppers in that space next year as additional protection.

Ozarks Gardening
Copyright© Jim Long 2012